
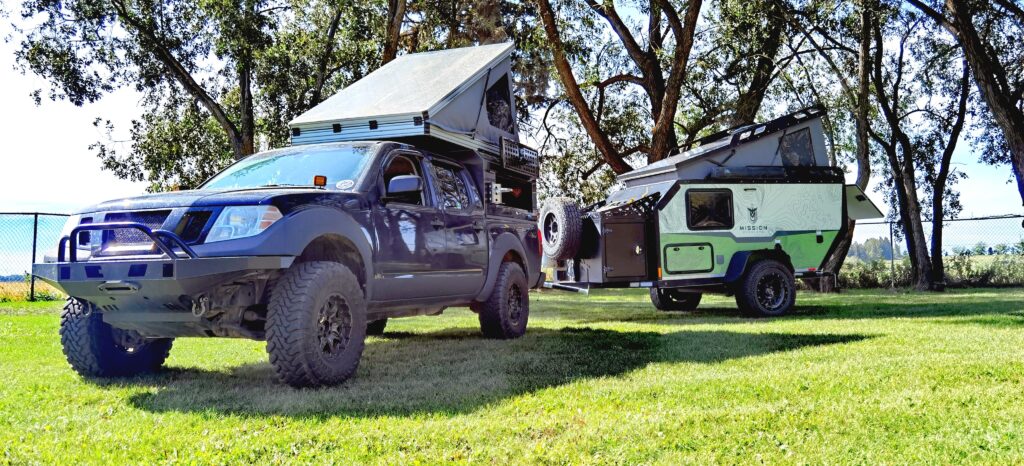
A pop-up camper only earns its place in the backcountry if it keeps weight low, gear secure, and sleeping space dry when the weather turns. If you are learning how to build a pop up truck camper, start with the hard truth: the structure, truck fitment, and sealing details matter far more than the mattress or interior finish.
A capable build should work like part of the truck, not like a small RV perched on top of it. That means a low center of gravity, a shell that will not swell or rot, reliable tie-down points, and a roof system you can raise after a long day on a rough road. Build for the conditions you actually travel in, whether that means desert heat, mountain wind, hunting season snow, or all three in the same trip.
Start With Truck Payload and a Real Use Case
Before buying aluminum, composite panels, or a roof tent, find the payload sticker on your driver-side door jamb. Payload is not a suggestion. It must cover the camper, mounting hardware, passengers, fuel, recovery gear, water, tools, food, and every accessory added after the first trip.
A lightweight pop-up shell can make a midsize or half-ton truck far more useful than a traditional slide-in camper. But a camper that begins at 700 pounds rarely stays 700 pounds once it is fitted out. A 20-gallon water tank alone adds roughly 167 pounds. Batteries, a fridge, roof rack, awning, drawer system, and gear can erase your remaining payload quickly.
Be honest about how you camp. A hunter who needs locked storage for equipment has different priorities than a mountain biker carrying two bikes and a small kitchen. A couple sleeping through shoulder season needs better insulation and condensation control than a summer-only traveler. Define the job before you define the floor plan.
Choose a Lightweight Structure That Will Not Rot
The biggest decision is the shell. Wood-framed construction is familiar and inexpensive, but it invites water damage when fasteners loosen, sealant fails, or condensation finds its way into a wall. On a truck that sees washboard roads and changing temperatures, those weak points eventually get tested and ultimately will fail.
For a purpose-built overland camper, aluminum framing or a formed aluminum exoskeleton paired with composite panels makes more sense. It keeps weight under control, resists rot, and gives the structure a better chance of surviving vibration. Use corrosion-resistant fasteners, isolate dissimilar metals where required, and avoid creating pockets that trap water.
The roof deserves extra attention. It needs to be strong enough to span the bed, support its own lifted structure, and handle wind load when raised. If you want a roof rack, solar panel, awning, or recovery boards overhead, calculate those loads before choosing lift hardware. A roof that lifts easily when empty may bind or sag after accessories are added.
Campers that rely on a welded alluminium tube or extrusion frame also run into the typical challenges of cracking alluminium welds, when a single weld fails on on a frame the entire frame is compromised, and few people have the skill or equipment to weld alluminium. This is where formed alluminum panels really shine and provide more long term structure and survives extreme trail and road conditions over time.
Build the Camper Around a Low, Stable Profile
Keep heavy components low and near the truck bed. Put batteries, water, tools, and dense recovery equipment close to the floor and as close to the axle line as possible. Avoid stacking weight high in the roof or far behind the rear axle, where it can make the truck feel unsettled on off-camber trails.
A canopy-style camper is often the cleanest layout. It retains protected cargo space below while the roof lifts to create standing room and an elevated sleeping platform. It also preserves the truck’s compact footprint, which matters on tight forest roads and in daily driving.
How to Build a Pop Up Truck Camper Roof System
The pop-up mechanism is where many DIY builds become frustrating. A roof that rattles, leaks, or refuses to lift in cold weather will make every trip harder. Choose the lifting method based on roof weight and intended use, not what looks easiest on a workbench.
Gas struts work well for lighter roofs and simple builds. They are compact and relatively affordable, but their performance changes with temperature and roof load. A roof that pops up in a warm garage may feel heavy in freezing weather. Mechanical linkages, spring-assisted systems, and electric actuators cost more and add complexity, yet they can be a better answer for a heavier insulated roof or a build carrying exterior equipment.
The roof must lock positively in both positions. In the travel position, use compression latches that pull the roof evenly onto its seals. In the raised position, do not rely solely on gas struts. Add mechanical safety supports or locking arms designed to hold the roof if a strut fails.
Your soft wall should be durable, repairable, and shaped to shed water. Automotive-grade fabric or insulated tent material is common, but the seams, window zippers, and attachment points deserve equal attention. Use large screened windows for warm-weather airflow, then give yourself a way to close them tightly against wind-driven rain and dust.
Seal Against Water, Dust, and Condensation
Water intrusion is usually a design problem before it becomes a sealant problem. Give every horizontal surface a path to drain. Use drip edges above doors and windows. Keep roof seams away from standing water where possible, and use butyl tape behind exterior flanges rather than depending on a thick bead of caulk alone.
Dust is just as persistent on gravel roads. Door seals, access hatches, wiring penetrations, and the tailgate area all need attention. A camper can be watertight in the rain and still fill with fine dust after 30 miles of washboard.
Condensation is the other enemy of all-season comfort. Warm occupants create moisture, and that moisture collects on cold surfaces overnight. Insulate the roof and walls where practical, create controlled ventilation high and low, and make sure bedding does not sit directly against a cold exterior wall. In cold conditions, a cracked vent and a small source of dry heat often make a bigger difference than adding another decorative panel.
Wire It for the Way You Travel
A simple electrical system is easier to diagnose far from pavement. Start with a fused 12-volt system for lighting, ventilation, charging, and refrigeration. Mount the battery in a protected, ventilated location, use properly sized wire, and secure every run against chafing and vibration.
For most weekend travelers, a modest lithium battery, DC-to-DC charging from the truck, and a roof-mounted solar panel can support the essentials. If you work remotely, run a compressor fridge for days, or camp in winter, increase capacity based on actual consumption rather than guessing. More battery capacity adds weight, cost, and charging demands.
Leave service loops in wiring, label both ends, and install accessible fuses. The cleanest-looking electrical system is not always the best one. The best one is the system you can inspect and repair with basic tools at a trailhead.
Build Security Into the Shell
A truck camper carries expensive equipment, often while parked at trailheads or overnight stops. Thin panels, exposed hinges, and basic cabinet latches make easy targets. Use lockable exterior access points, protected hinges, reinforced door frames, and secure tie-down locations inside the bed area.
Separate sleeping space from gear storage whenever possible. Wet boots, fuel containers, fishing equipment, and recovery tools do not belong in the same small area where you sleep. A well-planned canopy camper lets you load dirty gear low, lock it up, and still raise the roof for a clean, fast camp setup.
Test Before You Finish the Interior
Do not install finished wall panels, flooring, and cabinetry until the shell has been tested. Drive it on rough roads. Spray it with water. Raise and lower the roof repeatedly. Load the rack to its planned weight. Check every latch, fastener, and wire after the first few hundred miles.
This stage reveals what needs reinforcement and where the noise is coming from. It is much easier to fix a flexing roof corner before you have installed a finished ceiling and upholstered bed platform.
Building your own camper can be deeply satisfying, especially if you have the fabrication skills and time to test it properly. If you want a proven lightweight, no-wood platform built for rough roads and four-season use, Blindman Overland takes the same priorities seriously: low weight, secure storage, durable materials, and a shelter that is ready when the road runs out. Build carefully, keep the load honest, and let the truck take you farther with less to worry about.