
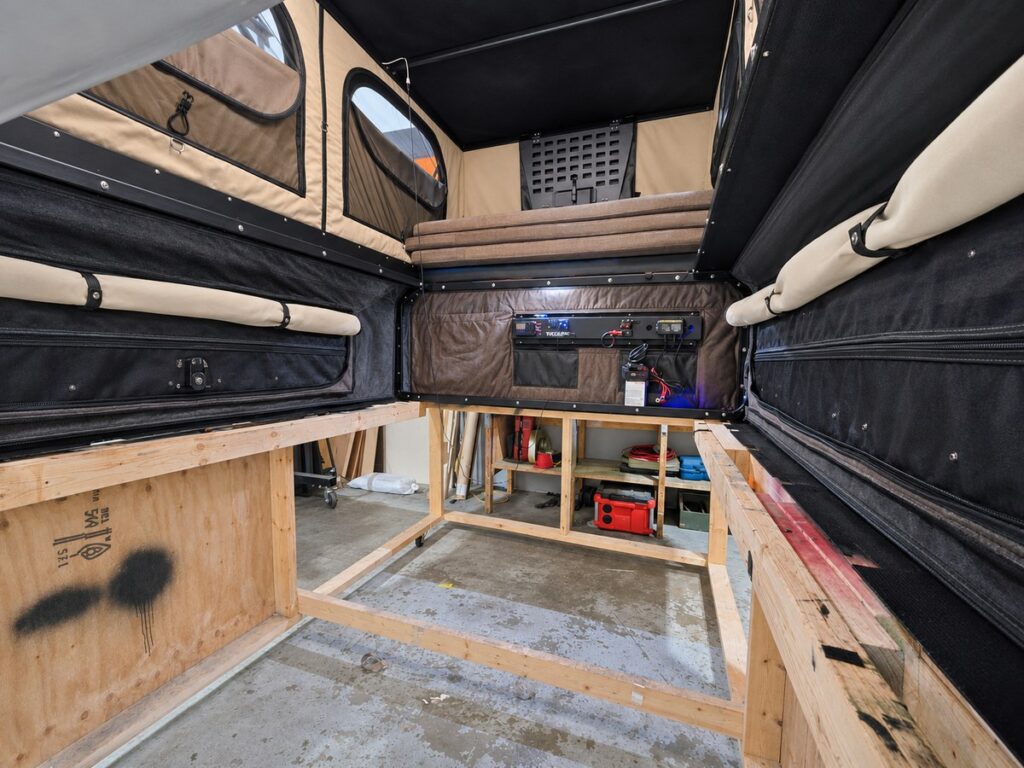
A dead battery at a trailhead is rarely caused by one dramatic failure. More often, it comes from a loose crimp, an undersized wire, an unfused accessory lead, or a cable rubbed through where the truck meets the camper. A proper truck camper wiring installation is what turns lights, refrigeration, charging, and recovery gear into equipment you can trust when pavement is a long way behind you.
The goal is not to add the most electronics. It is to build a system that fits how you travel, protects the truck and camper, and remains serviceable after washboard roads, cold starts, dust, and wet gear have done their best to expose weak points.
Truck Camper Wiring Installation Starts With Load Planning
Start with the loads, not the battery. Write down every device you expect to run and how long it will run in a typical day. A fridge, diesel heater, water pump, roof fan, lights, USB charging, inverter, communications gear, and portable compressor all draw differently. Some run constantly in short cycles; others pull hard for only a few minutes.
This simple exercise tells you whether a modest battery and basic charging setup will do the job or whether you need a larger lithium bank, solar, alternator charging, or all three. It also prevents a common mistake: sizing the system around a sunny summer weekend, then finding it cannot keep up during a cold, dark shoulder-season trip.
Think in separate systems. The truck’s starting battery should remain protected. The camper house battery should power living loads. High-draw equipment such as an inverter needs its own appropriately sized conductors, fuse, disconnect, and battery connection. Do not treat every accessory as another wire to tap into wherever power happens to be nearby.
Build a circuit map before cutting wire
A clean electrical plan identifies the power source, wire size, fuse size, switch or relay, connector, ground or negative return, and destination for every circuit. Label both ends of every wire as you install it. Six months later, when you are diagnosing a light or adding a compressor, that label can save an hour of guesswork.
Your main distribution area should be accessible without unloading half the truck. It needs room for fuses, busbars, battery disconnects, chargers, and future expansion. A compact camper does not need a complicated electrical system, but it does need one that can be inspected and serviced without tearing apart finished panels.
Size Wire for Distance, Not Just Amps
Wire gauge is not simply an amp rating question. Distance matters because voltage drops as current travels through a conductor. A light may tolerate some voltage loss. A compressor fridge, DC-to-DC charger, or inverter may not. Long runs from the truck battery to the camper are especially sensitive, particularly on a 12-volt system.
Use appropriately sized copper cable for the actual run length, including the return path where applicable. Oversizing a long cable is usually cheaper than chasing inconsistent charging or poor appliance performance later. The same logic applies to solar wiring, although higher-voltage panel configurations can reduce current and help limit losses over distance.
Fuse conductors to protect the wire, not just the accessory. Place the primary fuse as close as practical to the power source, especially at the battery. If a cable gets damaged and contacts metal, that fuse is what keeps a bad day from becoming a serious electrical fire.
For most camper builds, dedicated negative return wiring is the dependable choice. Do not assume a truck bed, aluminum camper shell, or mounting hardware will provide a reliable return path. Bonding metal components may still be appropriate for safety and noise control, but the intended circuit should have a properly sized negative conductor back to the negative bus or battery.
Protect Wiring From Movement, Water, and Abrasion
A camper experiences more vibration than a stationary cabin. It flexes, shakes, heats up, cools down, and gets sprayed with road grime. Wiring that looks tidy in a shop can fail quickly if it is unsupported or routed through sharp metal.
Run cables through split loom, conduit, or abrasion-resistant sleeving where they pass near edges, storage compartments, or moving hardware. Use grommets in every drilled metal opening. Secure wire runs at regular intervals with clamps or mounts designed for the environment, rather than relying on a few zip ties that can loosen, chafe, or become brittle.
Pay special attention to the truck-to-camper connection. The cable needs enough slack for bed movement and camper removal, but not so much that it hangs low or catches debris. Weather-sealed connectors and strain relief are worth the effort here. This connection sees vibration, moisture, salt, and repeated handling.
Pop-up campers add another consideration: any wiring routed to a lifting roof or sleeping area must move freely throughout the full lift cycle. Test it while the camper is raised and lowered. A wire that is just barely long enough in the shop will not stay that way after repeated use in cold weather.
Choose Charging That Matches Your Travel Style
Solar is excellent when you camp in open country for several days, but it is not magic under forest canopy, heavy snow, or short winter daylight. Alternator charging is valuable for travelers who cover ground every day however its important to understand that systems that tie into your start batteru can fail and a dead start battery in winter camping can mean life or death.
Shore charging makes sense for people who use campgrounds, store the camper plugged in, or want a dependable way to top up before departure.
A DC-to-DC charger is often the right bridge between truck and camper because it controls charging current and can provide the profile required by lithium batteries. It also helps protect the vehicle charging system from being asked to do more than it should. The exact size depends on alternator capacity, cable length, battery chemistry, and how much charge you realistically need to replace while driving.
Solar charge controllers, DC-to-DC chargers, and shore chargers should be configured for the battery type installed. A battery monitor is equally valuable. Voltage alone does not tell you much about lithium state of charge, and it tells only part of the story with lead-acid batteries. Knowing actual amps in and out helps you change your habits before the battery is flat.
Separate Low-Voltage and 120-Volt Work
A 12-volt system is forgiving compared with household power, but it can still deliver enough current to melt tools, cables, and terminals. Keep positive terminals covered, install a clearly marked battery disconnect, and use quality crimp terminals sized for both the wire and stud. A proper crimping tool matters. Poor crimps create resistance, heat, and frustrating intermittent faults.
If your camper includes shore power, an inverter, or 120-volt outlets, treat that as a separate system with proper breakers, grounding, enclosures, and transfer equipment where required. This is not the place for improvised connections or household extension-cord solutions hidden behind cabinetry. If you are not experienced with AC electrical work, have a qualified RV or marine electrical technician complete or inspect that portion of the build.
Keep AC and DC wiring physically separated where possible. It improves organization, reduces the chance of damage during service, and makes troubleshooting less confusing. Clear labels on the electrical panel are not cosmetic. They matter when someone else has to shut down power quickly.
Test Before You Trust It Off-Grid
Do not wait for the first remote trip to learn whether the system works. Test every circuit with the engine off, then with the engine running. Confirm solar input in daylight, verify charging at the house battery, and run your expected loads together. Check voltage at the battery and again at the appliance under load to spot excessive voltage drop.
Feel major terminals and cable connections after high-current operation. They should not be hot. Inspect wire routing with the camper loaded, roof raised, doors opened, and suspension moving through normal travel conditions. Then recheck fasteners and terminals after the first few trips. Vibration settles components in, and catching a loose connection early is easy.
At Blindman Overland, wiring work is approached as part of the whole camping platform: secure storage, low weight, weather exposure, truck fitment, and how the owner actually uses the rig all matter. A clean install should support the freedom of a lightweight truck camper, not add another system to worry about.
Build for the trip you take when the weather turns, daylight disappears, and the nearest outlet is far behind you. Good wiring stays quiet in the background, doing its job while you live free and keep moving.